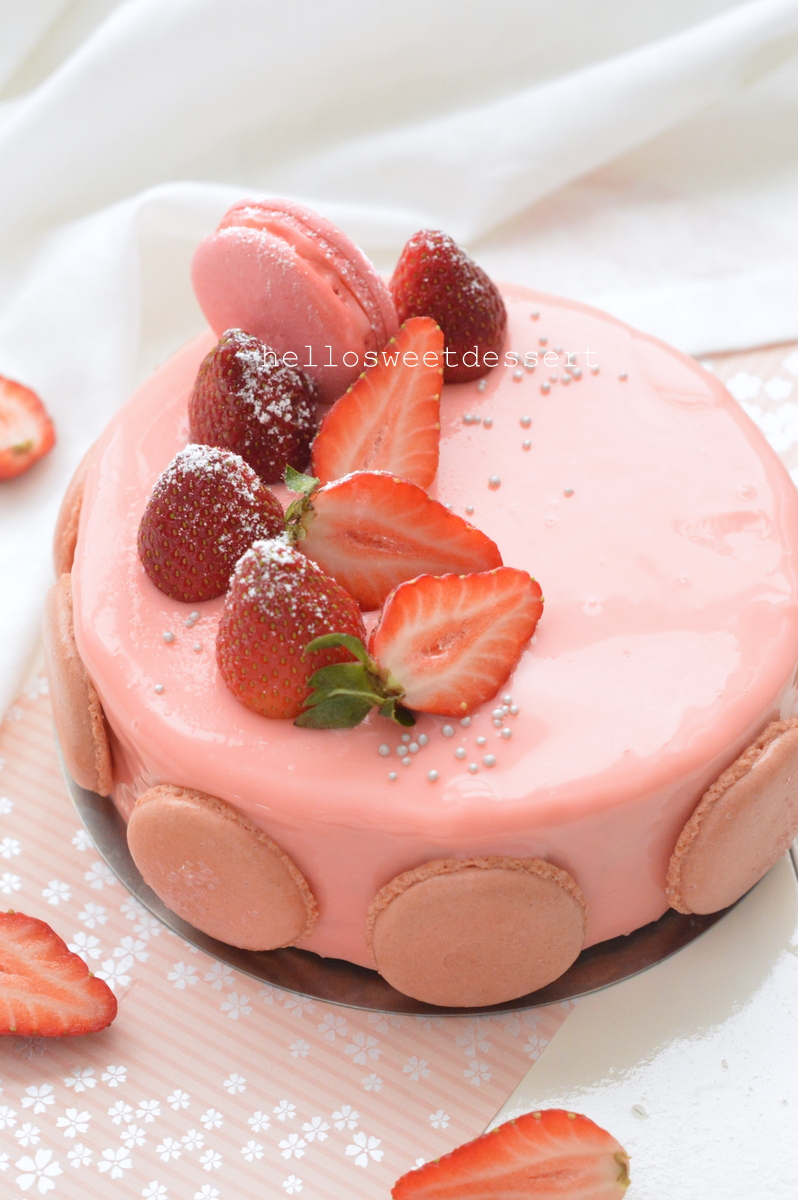
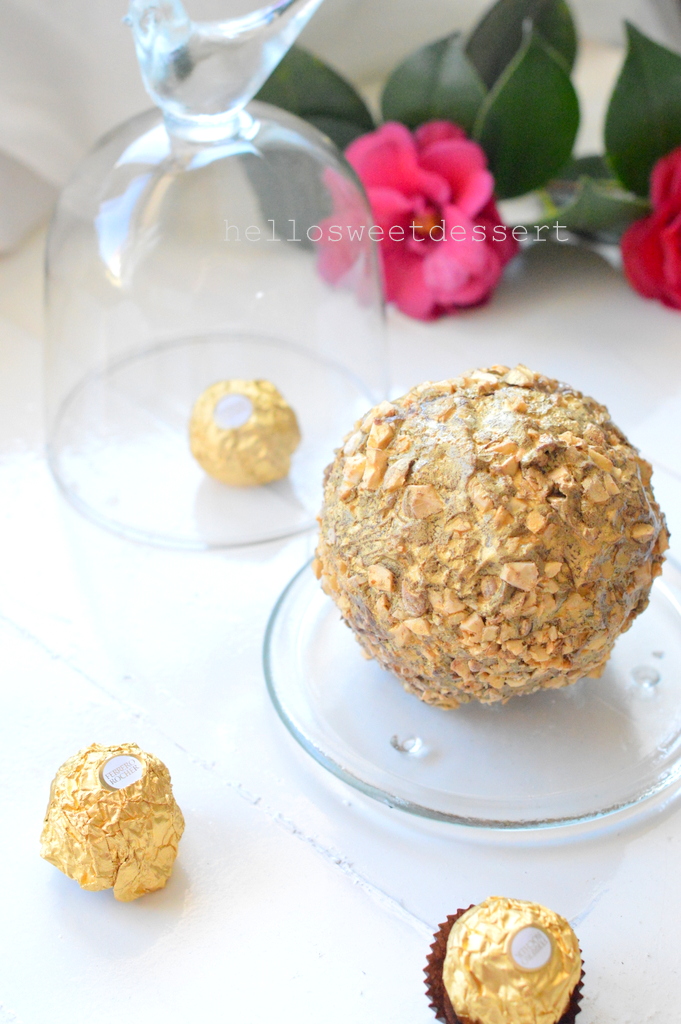
Christmas is coming and then welcoming new year 2019. How to celebrate?To me, a classic moist, and rich chocolate cake with some nice decoration and share with my close friends.
I love flower.Every ladies should love flower as gift. My husband does not buy me much bouquet, that explains I love my dessert to look like any kind of beautiful petals. ( One of my self-comforting methods, embarrassed )
This classic chocolate cake is extremely, confidently and no hesitation for me to crown it as : The most moist, rich, softest and chocolatey cake I ever tasted, more than one positive descriptions. Yes, you may taste this cake from somewhere in a good bakery shop. We were not aware of what kind of chemicals or softening agent they might added into those moist cakes. This cake is definitely 100% chemicals-free from any softening agent. My husband and I had to thumbs up for this classic chocolate cake. Remember: Moist, rich, softest, and cottony are those words I can find.
3 little components, shall we start?

3 components:
- Classic chocolate cake
- Dark chocolate mousse
- Chocolate glacage/glaze

Dark Chocolate Mousse:
@makes 1 X 6cm diameter half sphere
- 30g egg yolks
- 20g sugar
- 10g water
- 30g Cadbury baking dark chocolate ( or any baking dark chocolate)
- 70g Bulla whipping cream ( or any dairy whipping cream)
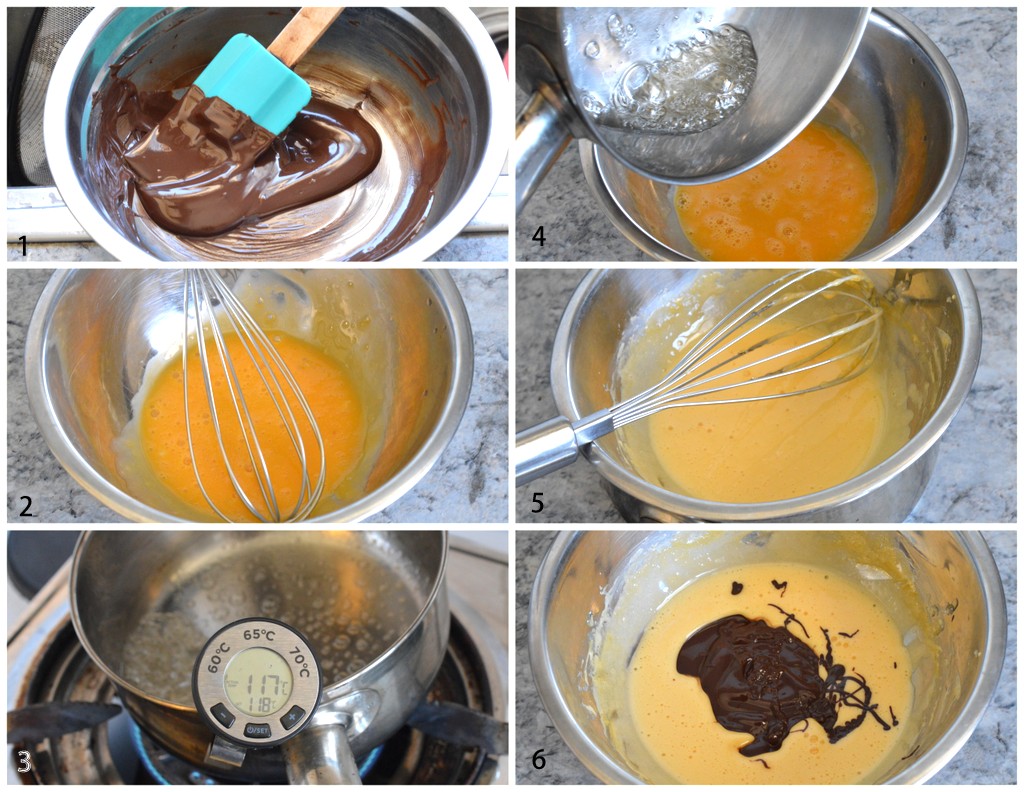
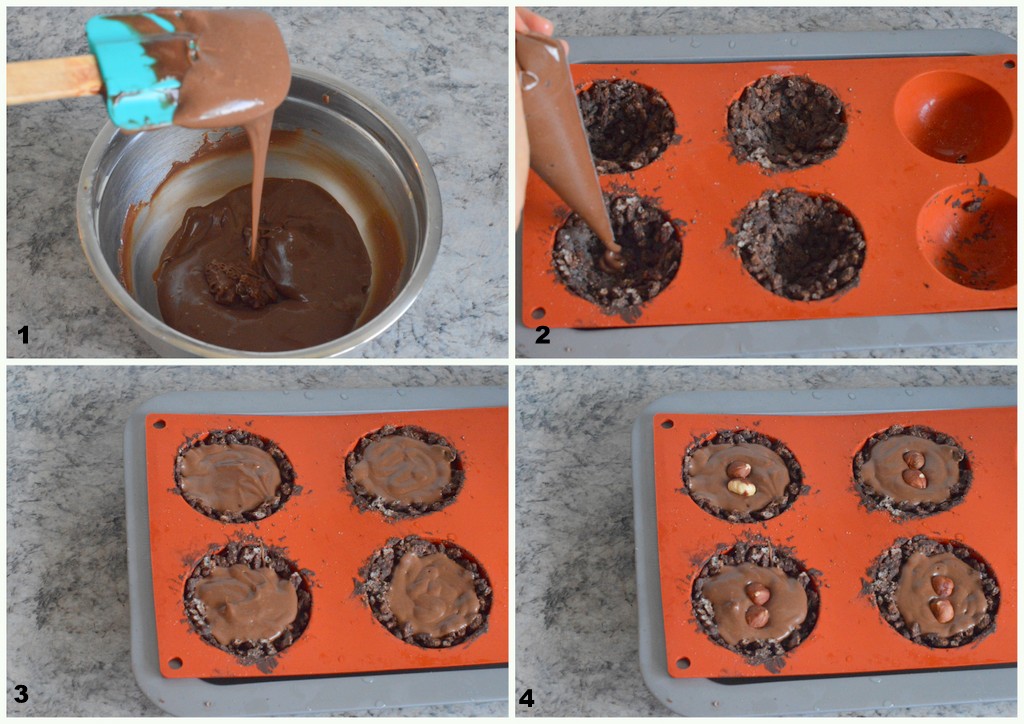
1)Melt chocolate over bain marie(a pot of simmering water sits underneath the bowl of chocolate without allowing water touches the chocolate)
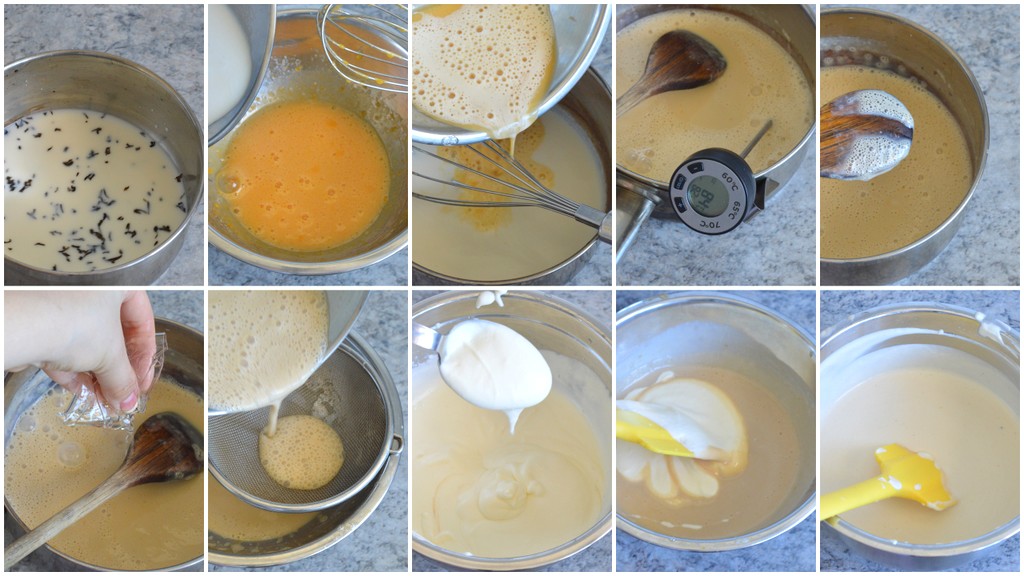
2)How to make Pate a bombe(a):
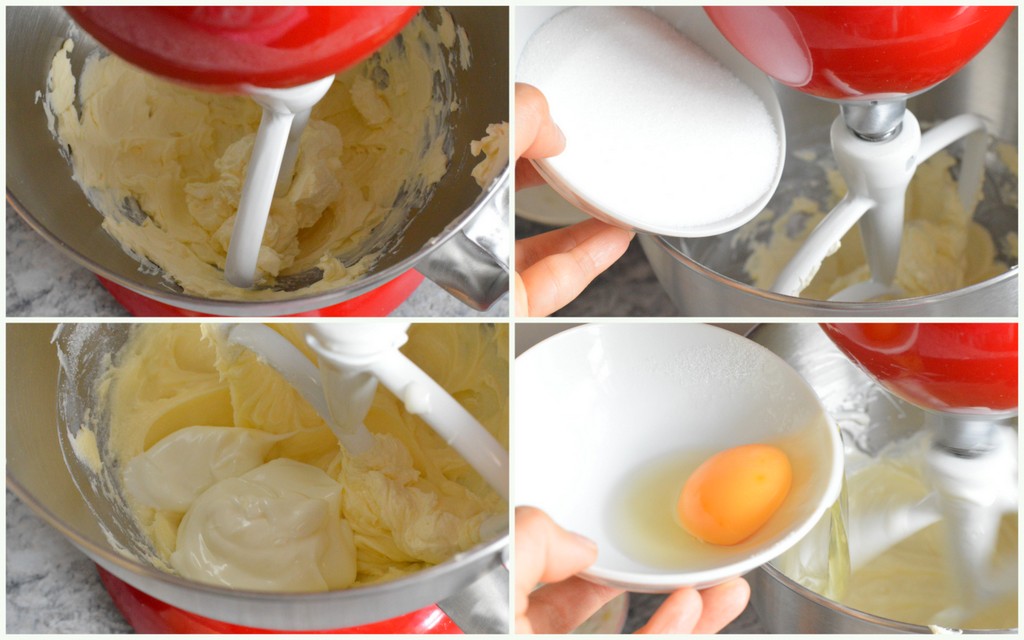
a)Beat egg yolks till foamy stage with hand whisk.
b)Heat up sugar and water in a pot till reached 117C.
c)Add in to beaten egg yolks slowly and keep whisking fast until slightly pale like picture shown.This is called pate a bombe.
3)Fold in the melted chocolate into pate a bombe(a)from step (2).(It will slightly turned thick a little)
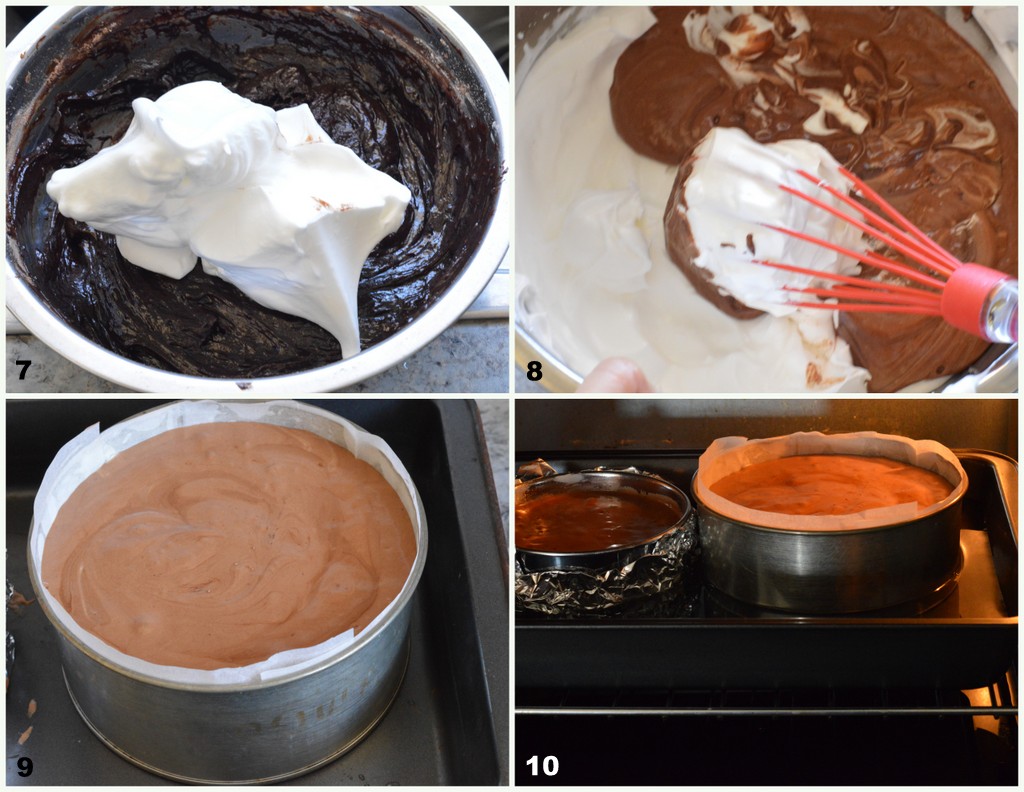
4)Beat cream in a mixing bowl till soft peaks formed. Fold whipped cream into chocolate mixture from step (3) in 2 additions. Pour into a 6cm diameter silicone half sphere mould. Freeze to harden.

Note:
(a)What is Pate a bombe:
A pâte à bombe is the French term for a mixture used as a base for making chocolate mousse and other mousse-like desserts.
It is made by pouring a sugar syrup that has been cooked until it is 117C degrees celsius over egg yolks and whipping the mixture until it is completely cold and has transformed into an uniform, unctuous, airy mass.
b)While comes to mixing pate a bombe and chocolate with the whipping cream, you will find the mixture is slightly hard to whisk at first, but if you keep whisking together, it will tend to loosen up a little.So do not panic,when you fold in the remaining cream, it will give you a smooth, velvety and heavenly chocolate mousse.
Classic Chocolate Cake:
@makes one 6″ round cake pan
- 67g Cadbury baking dark chocolate ( or any baking dark chocolate)
- 50g Western Star unsalted butter ( any unsalted butter)
- 25g Bulla whipping cream ( or any dairy whipping cream)
- 50g egg yolks
- 136g egg whites
- pinch of cream of tartar
- 40g castor sugar
- 20g cake flour
- 20g Hershey unsweetened cocoa powder ( or any unsweetened cocoa powder)
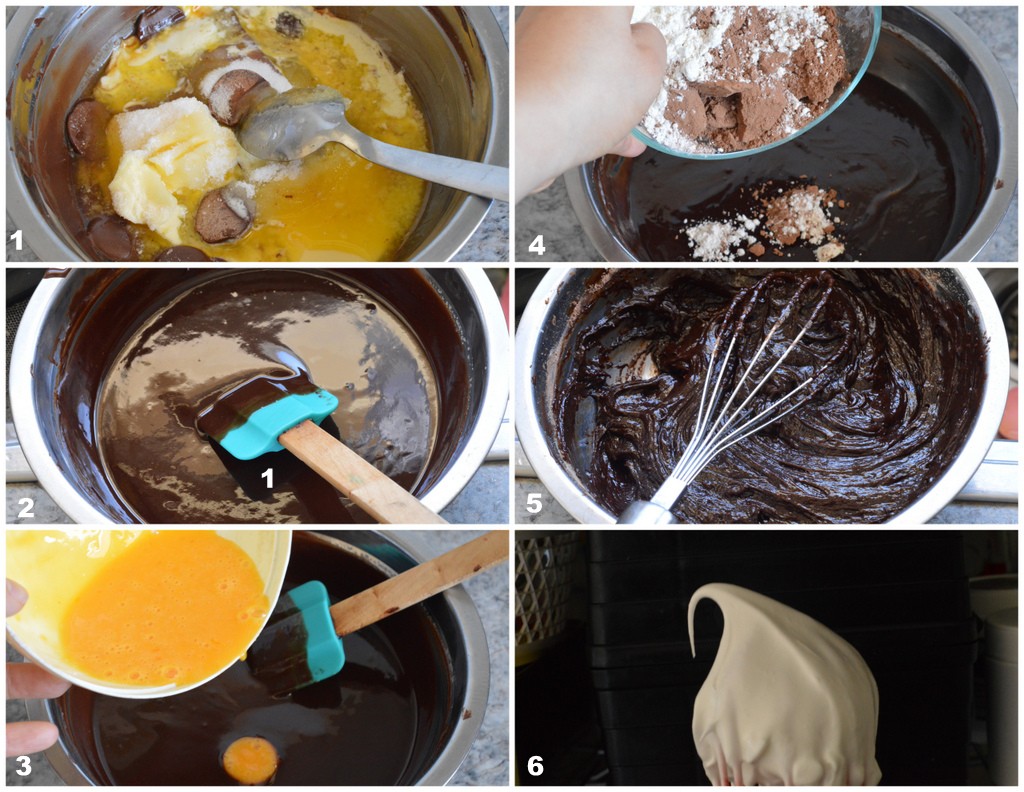
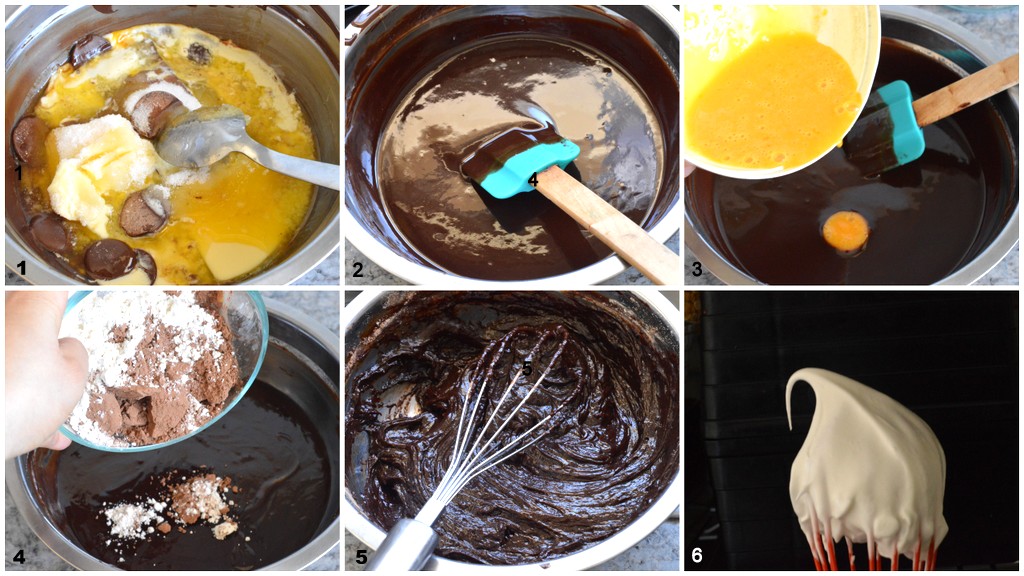
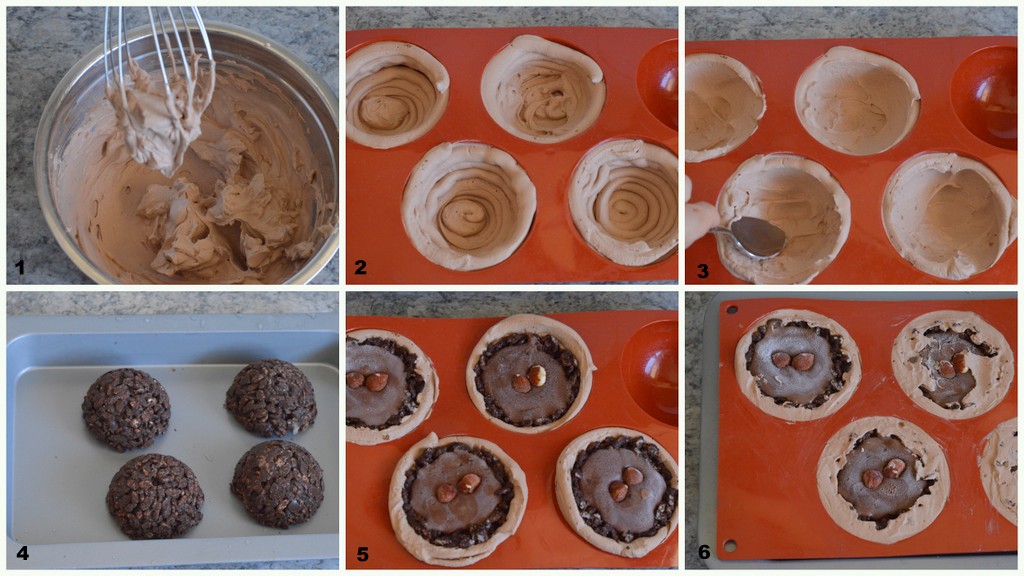
1)Melt chocolate, cream and butter over bain marie(a) (double boiler) until all dissolved. Mix well.
2)Lightly beat egg yolks and slowly add into chocolate mixture from step (1). Sift in cake flour and cocoa powder.
3)Beat egg whites and pinch of cream of tartar until foamy, slowly add in castor sugar and continued beating to soft peaked formed.(this is called “Meringue”)(b)
4)Fold in 1/3 of meringue from step (3) into chocolate mixture (You might find the mixture is slightly hard to mix but keep whisking until well combined.) Fold in remaining meringue till all incorporated.
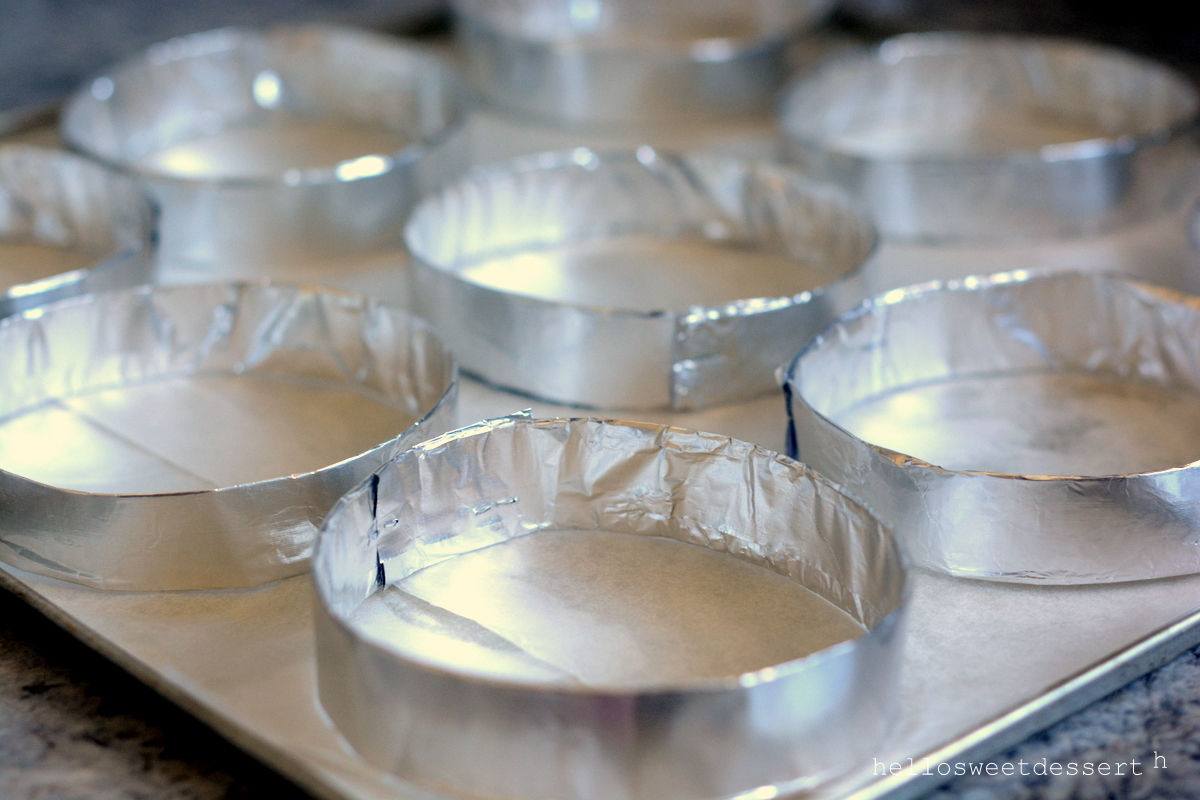
5)Oil the 6″ round cake pan and line with grease-proof paper on the bottom and sides.
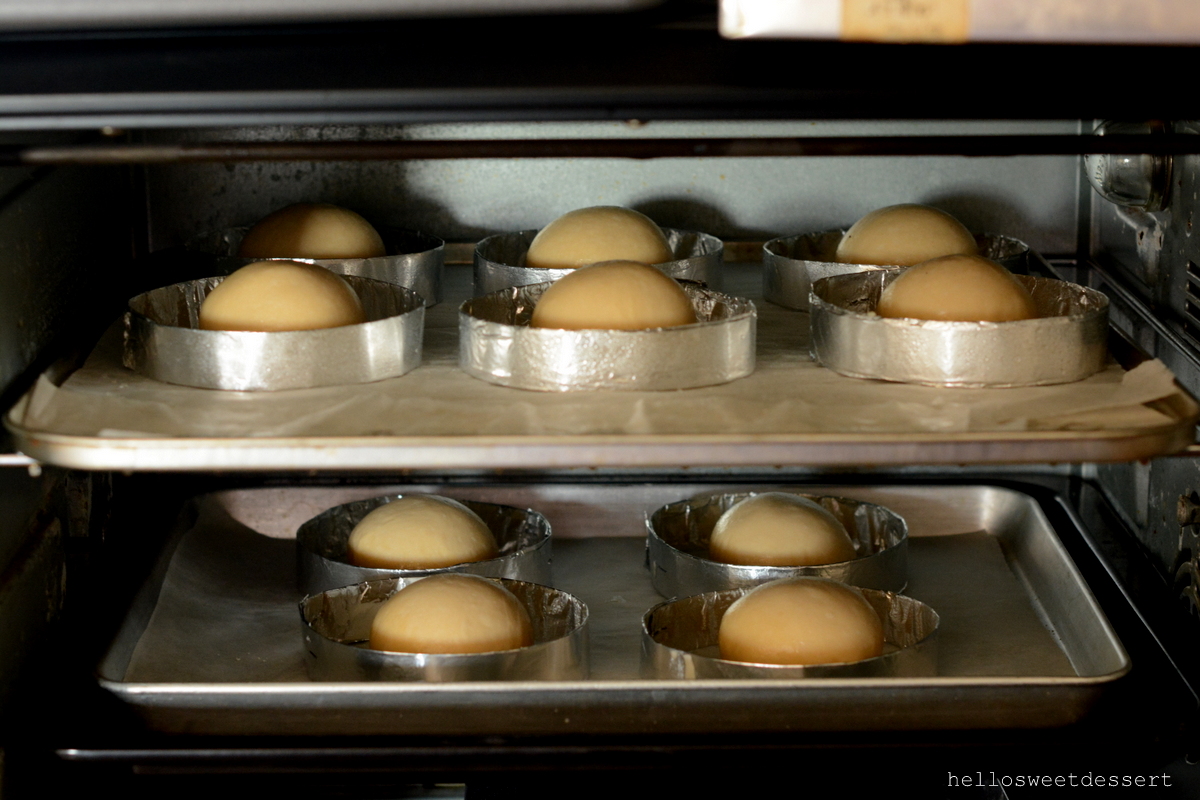
6)Pour in the cake batter into cake pan and bake in water bath(d) at 140C for 70-80 minutes or until inserted skewer in the middle comes out clean.
7) Once baked, remove from oven and inverted to cooling rack.Allow to cool completely.


This cake is undeniable: RICH, chocolatey, MOIST, SOFT and exquisite. You can just eat all by it’s own. No lie.
Note:
(a)Bain marie or double boiler means a pan of hot water in which a cooking container is placed above it for slow cooking. Please remember do not allow the hot water touches the bowl of chocolate mixture while using slow heat cooking it.
(b)what is meringue? Meringue means egg whites and castor sugar are beaten to airy texture with alot of air pockets trapped inside.Usually to double or tripled of volume.
c)Always remember when folding meringue into chocolate mixture,it has to be done slowly and gently without deflating the air pockets, usually by using spatula to fold from bottom to upwards in slow motion until both mixture are well combined without any trace of meringue has been seen. Deflating the air pockets will not produce a well risen cake as result.
(d)To prepare a water bath for baking, put your filled cake pan in a larger pan and add enough boiling-hot water to reach halfway up the side of the smaller cake pan. I am using normal round cake pan.If you are are using removable cake pan, remember to wrap the bottom with 2 layers of aluminium foil to prevent water seepage.
Chocolate Glacage/glaze:
- 20g Hershey unsweetened cocoa powder ( or any unsweetened cocoa powder)
- 40g sugar
- 30g water
- 30g Bulla whipping cream( or any dairy cream )
- 3g gelatin leave, soaked in cold water until soften
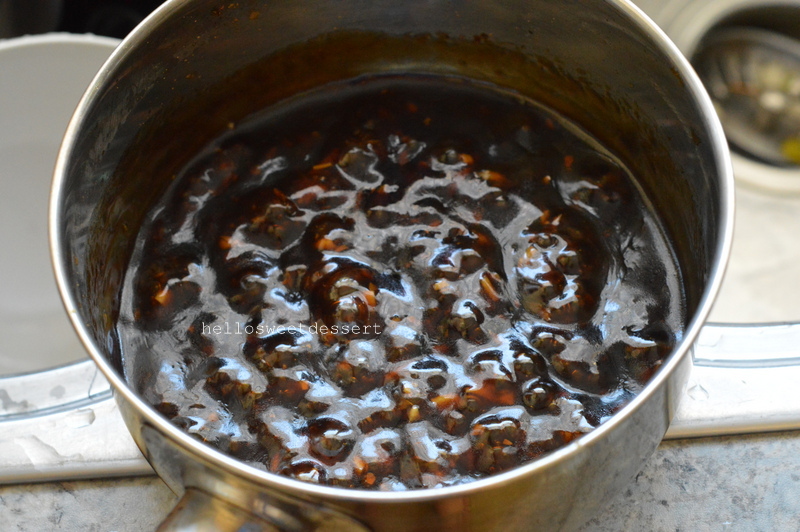
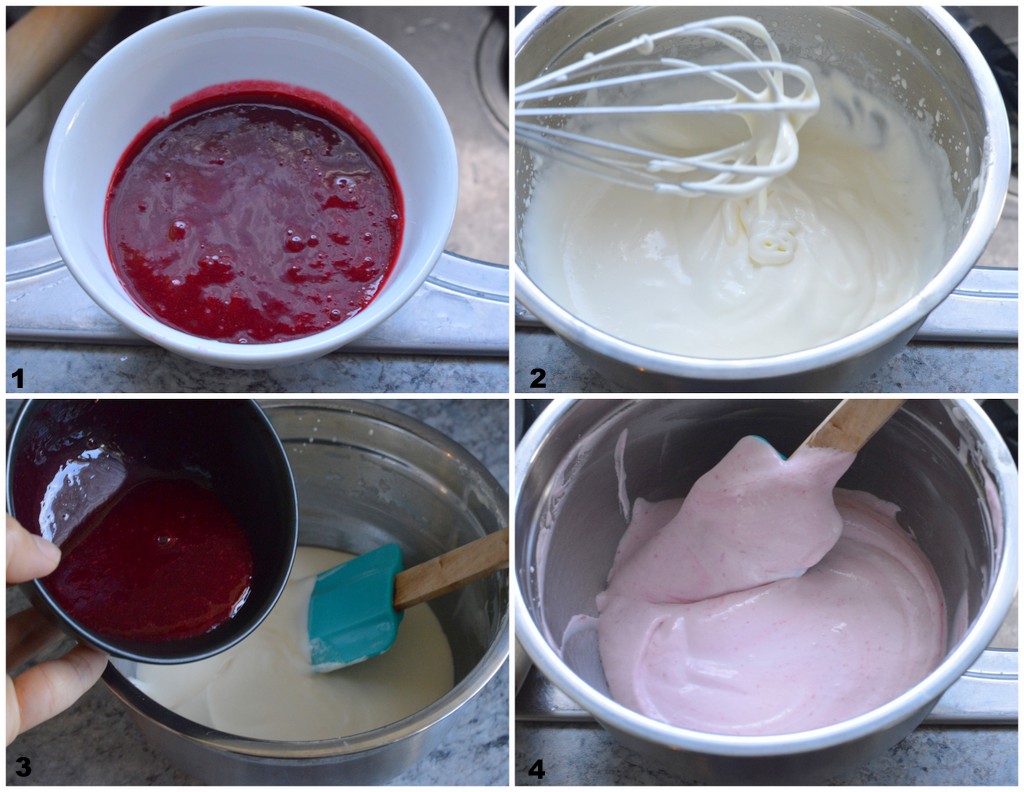
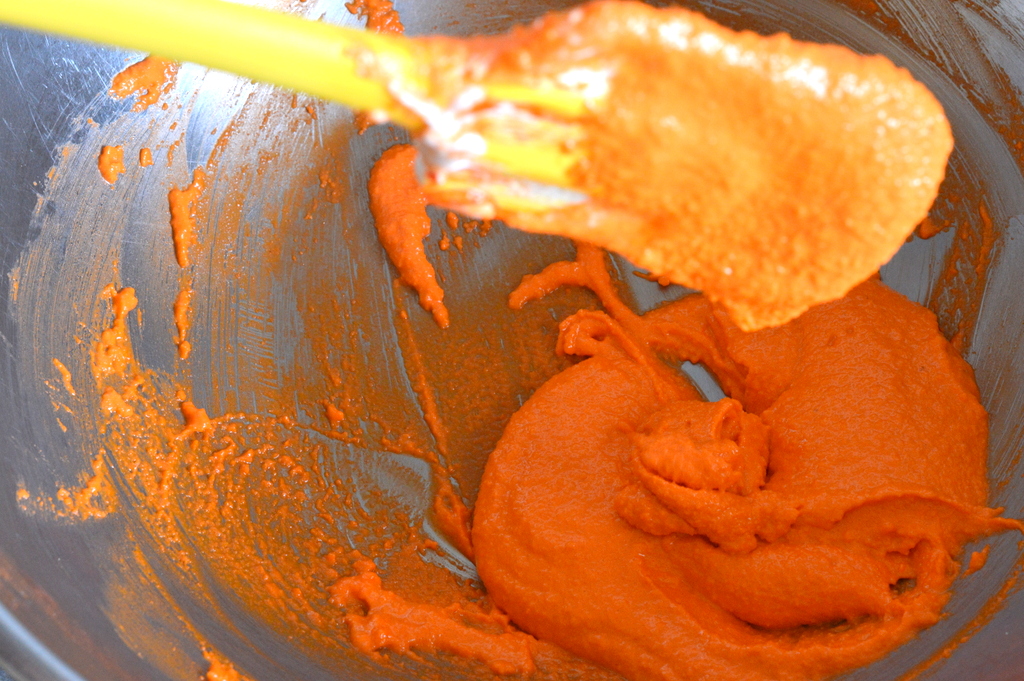
1)Boil water, cream and sugar. Slowly sift in cocoa powder. Mix well.
2)Bring back to heat on medium heat until just boil.Remove from heat.
3)Squeeze out water from soften gelatin leaves. Fold in gelatin leaves into chocolate mixture. Strain, and allow to cool.
Note:
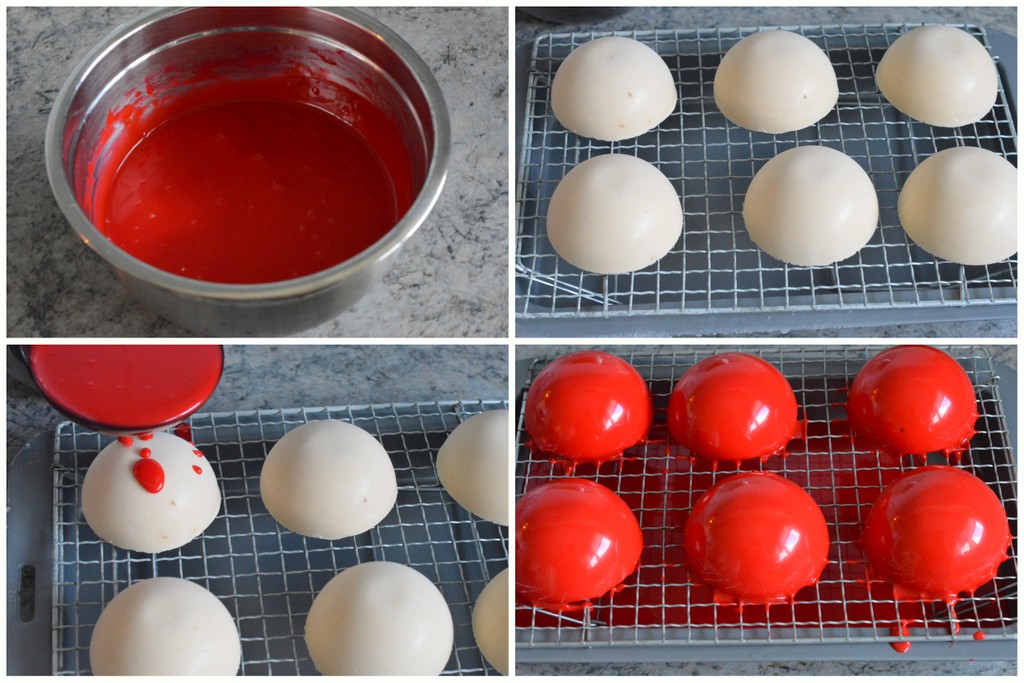
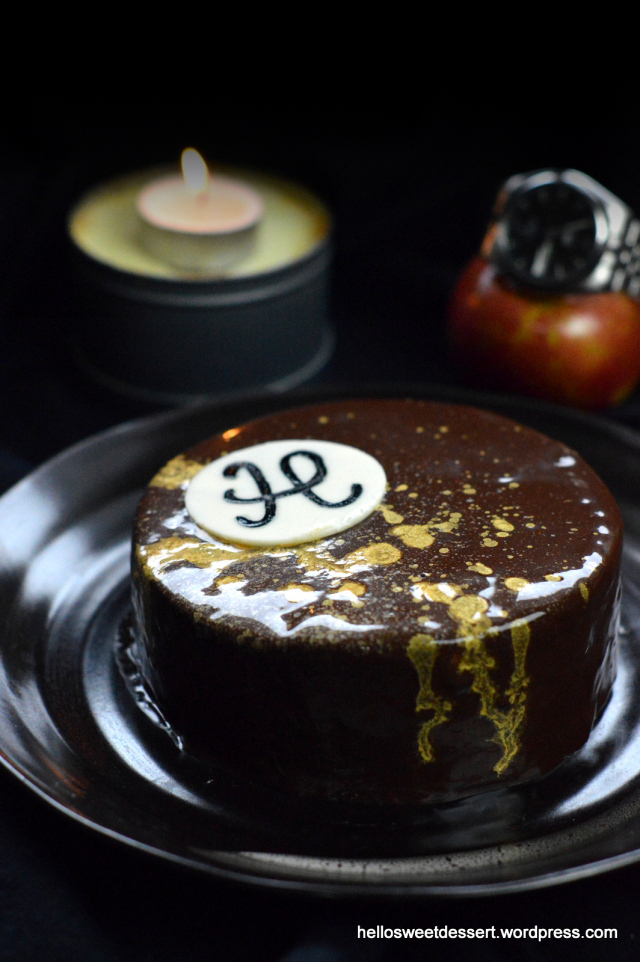
- It is best to cool down the chocolate glaze till 28-33C to glaze the mousse(frozen).
- Stir the glaze now and then before glazing to prevent skin forming.
- you can chill the glaze overnight to rest before using.The glaze will be jelly like texture form.
- Carefully warm up with bain-marie or microwave until liquid and no trace of lump.(Remember to cool down to the optimum temperature when glazing)

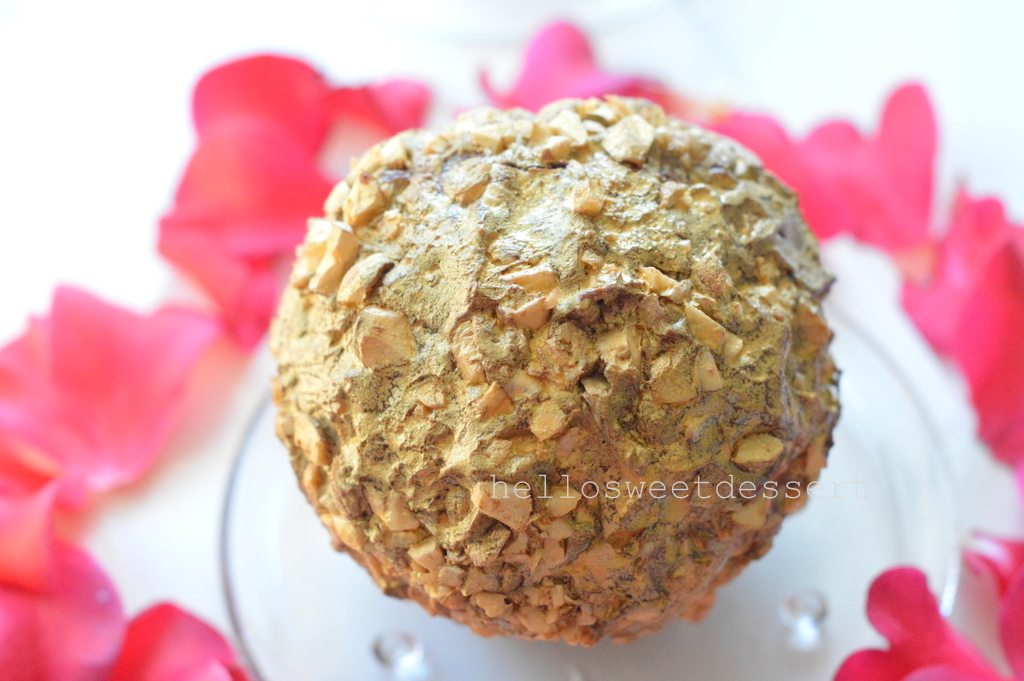
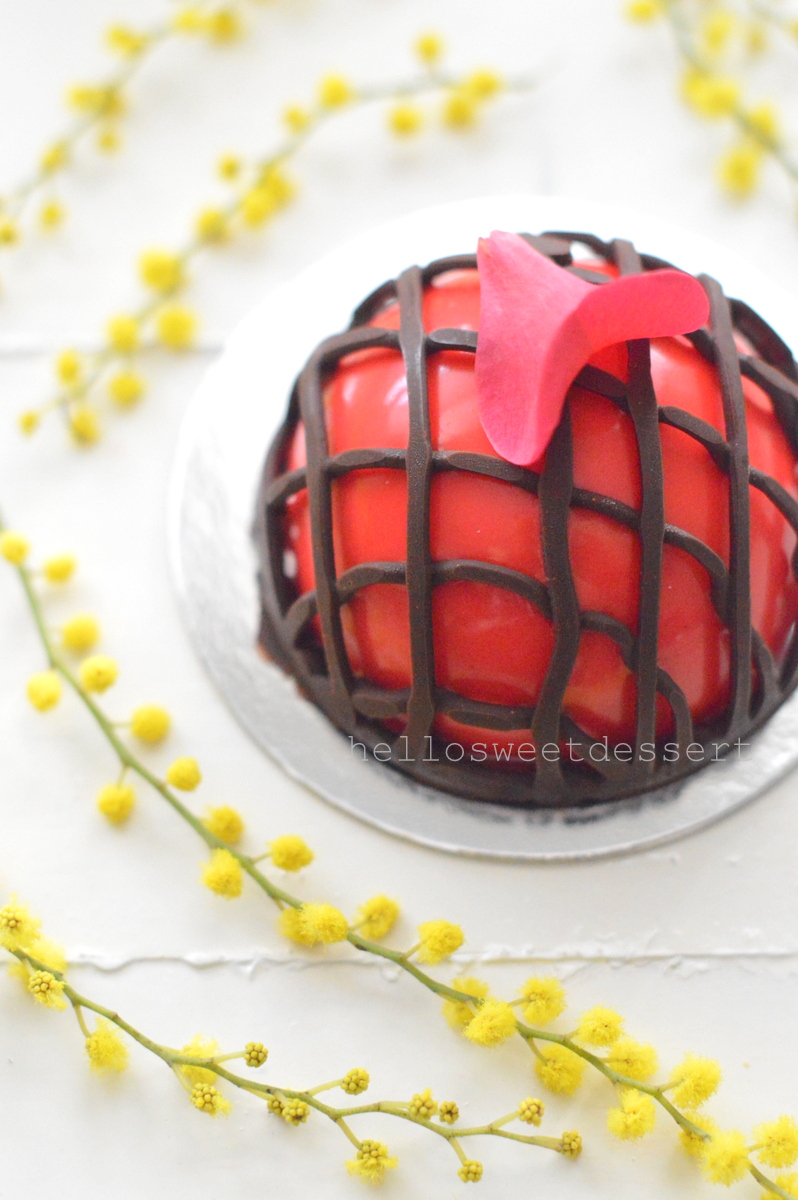
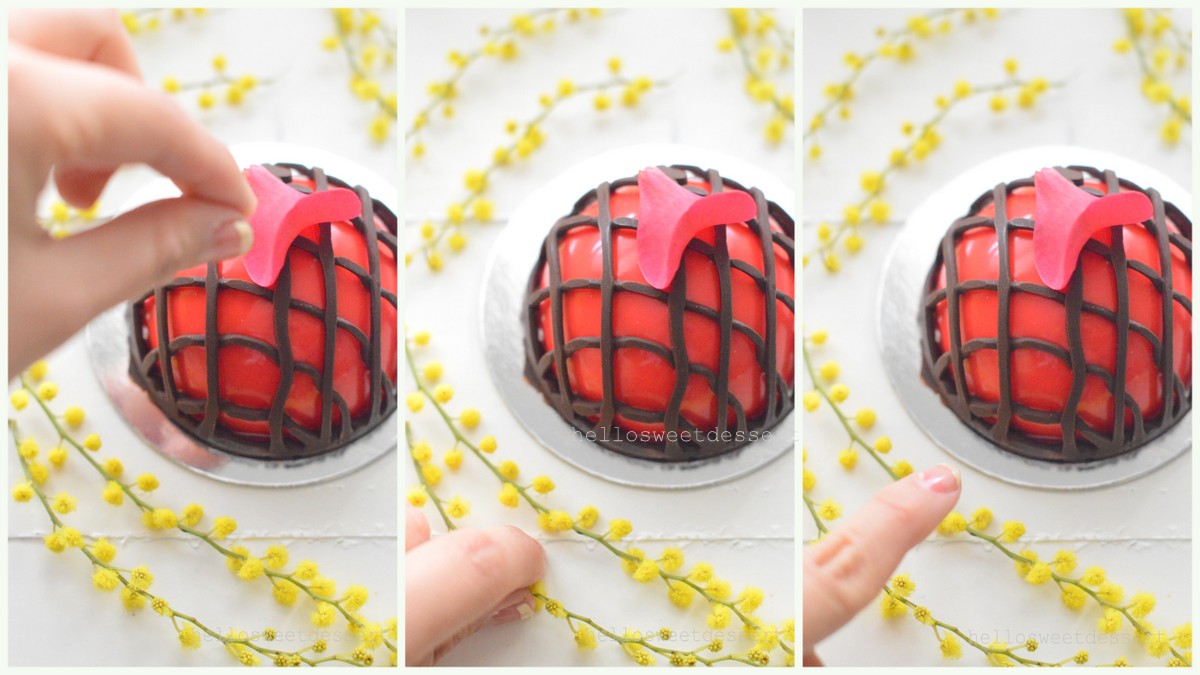
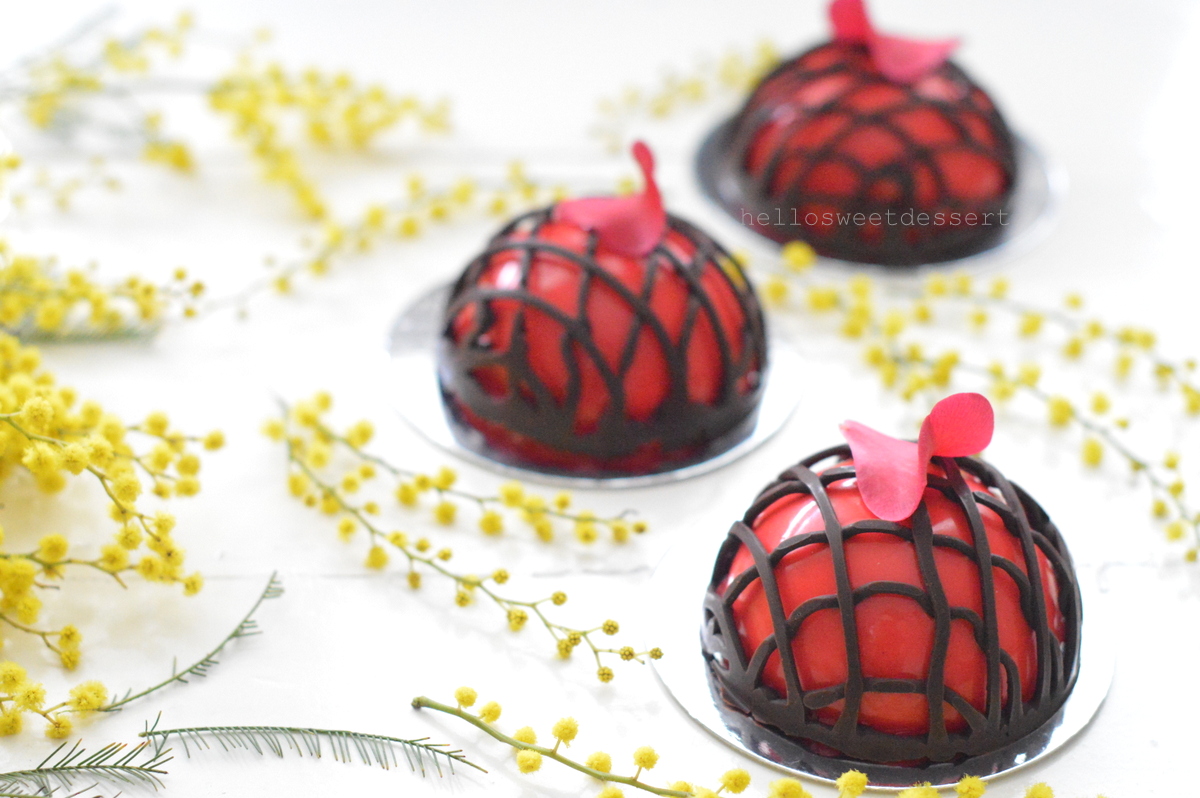
Prepared chocolate petals:(Decoration is optional)
- some Cadbury baking dark chocolate ( or any baking dark chocolate)
- rectangular acetate sheets
- A small baking tray
- rolling pin
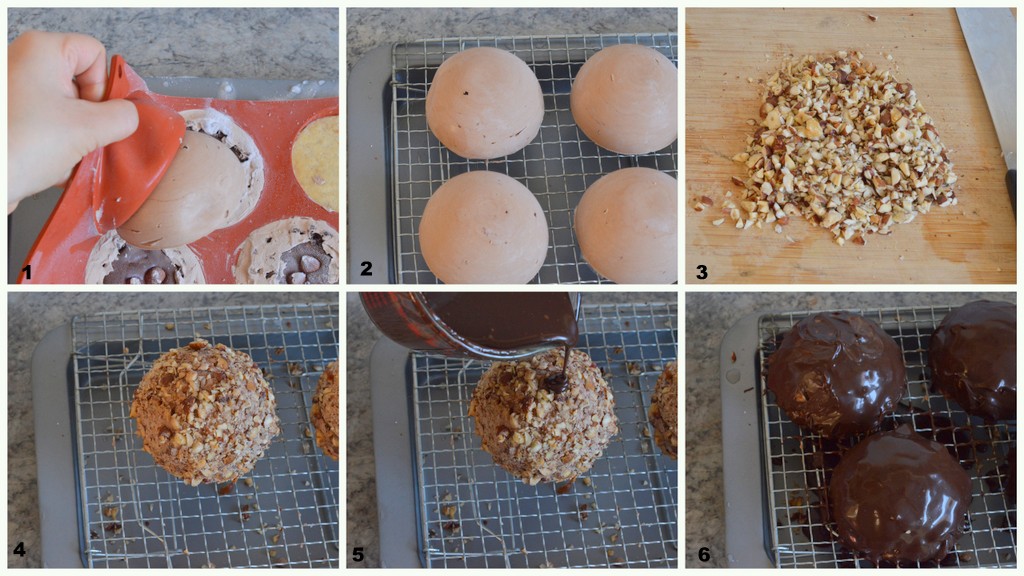
1)Melt dark chocolate in microwave on high heat.Bring out to stir well every 10 seconds until all melted.
2)Spoon one dollop of melted chocolate over the acetate sheets.By using small palette knife, lightly make a swirl circulation motion on the dollop of chocolate, then drag outside of the circle chocolate petal and lift your palette knife to make a pointy tail from the petal.Repeat few more chocolate petals on each acetate sheet.
3)Align the acetate sheet with the chocolate work on one side of the baking tray,by using a rolling pin to press down one side of the acetate, so it curls up the chocolate petals. Allow to harden in fridge.Once hardened, peel off every petals from acetate sheet.Repeat this step to make 40-60 petals altogether.

Assemble:
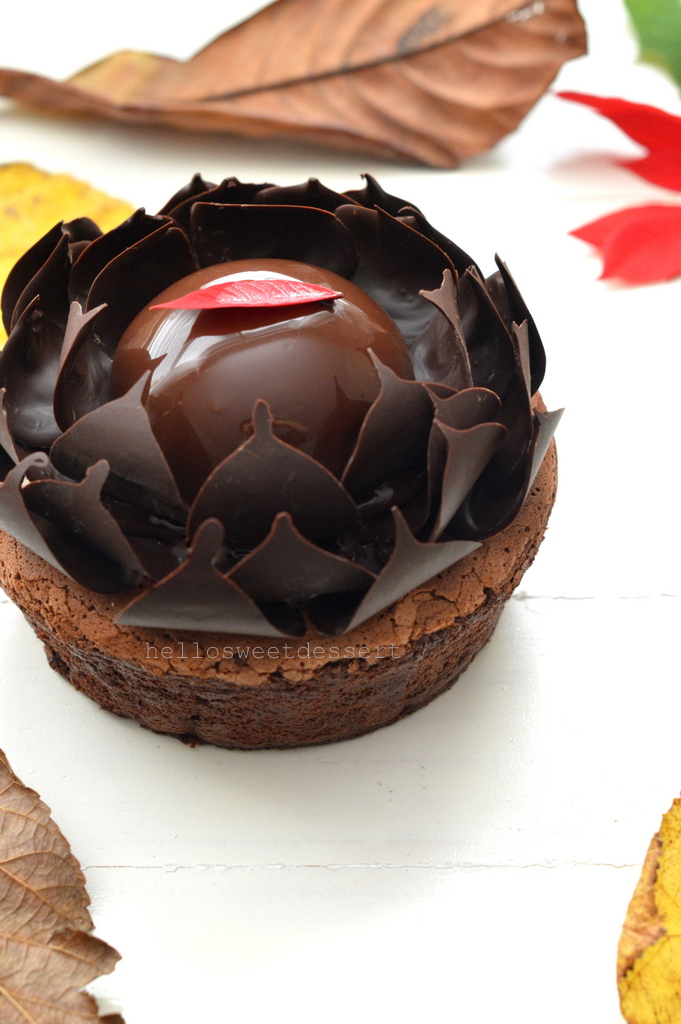
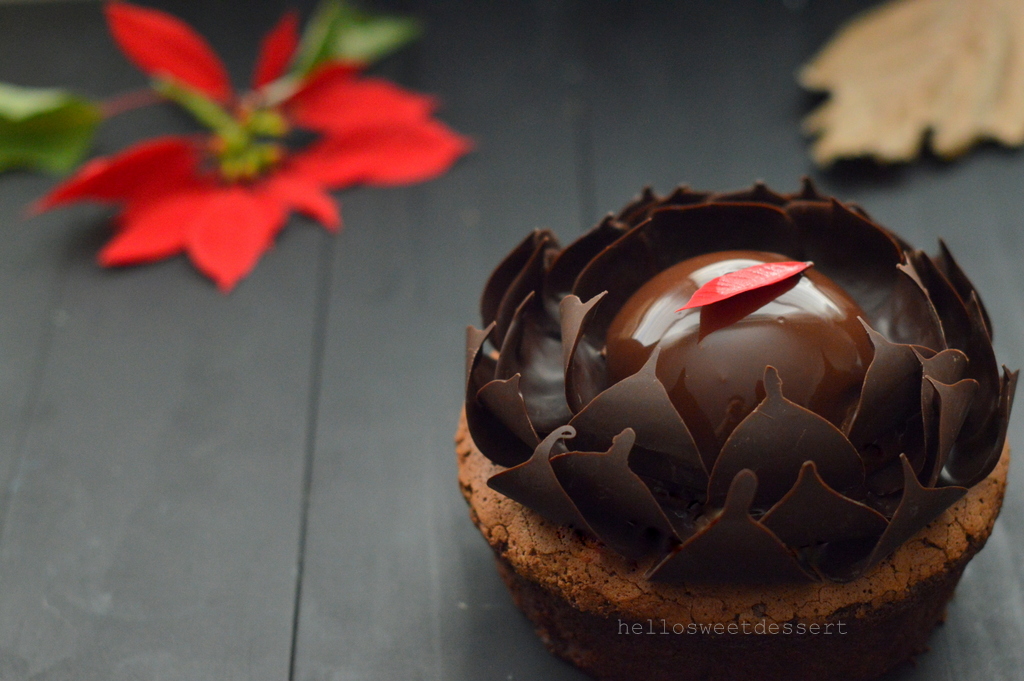
1)Remove chocolate mousse from silicon mould.Place on to a rack, pour the chocolate glaze over the harden chocolate mousse.Allow to drip excess.
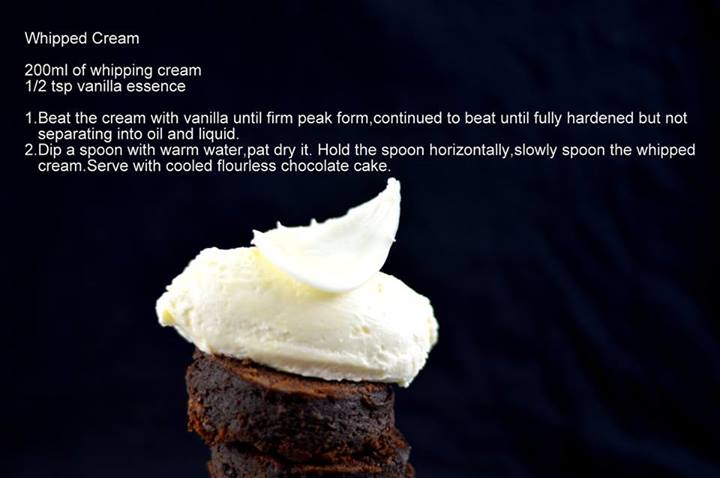
2)Pipe some whipped cream in the middle of classic chocolate cake. Place the chocolate mousse on the whipped cream.
3)Decorate with chocolate petals around to form a flower.(optional this part if you do not prefer any flower decoration.)
If you prefer no chocolate petals, you can whip some Chantilly cream (Which is cream, sugar and vanilla) then pipe around the chocolate mousse which is above the chocolate cake to replace the chocolate petals.Then to cover the whiteness of the whipped cream, you can shave some chocolate and cover the Chantilly cream or sprinkle with some almond flakes onto the whipped cream.IT is purely my suggestion.You can do however you prefer.Just enjoy the process.Go wild with your own imagination.
4)Serve.


Note:
(a)If you want to eliminate the mousse, welcome to just bake the moist chocolate cake.
(b)Decoration is for your own imagination, you can decorate however you love because that is your cake now. ^_^

Today’s Word:

MERRY Christmas and HAPPY new year 2019 everyone !
Love,
hellosweetdessert


 or (B)?I am trying to keep it as simple as possible to retain all the classic flavours")